


Outfitting a painting crew in Australia means matching equipment to the surface and setting: preparation and application tools for the work, plus protective coverings and masking materials to help shield floors, furniture and fixtures. Interior jobs need careful room protection; exterior work calls for equipment suited to exposed surfaces and access.
The finish matters, but so does the condition of the space when the crew leaves. Preparation, tidy work habits and the right protection help keep the job organised from the first pass to the final clean-up.
This guide explains how to plan equipment for interior and exterior painting, protect surrounding areas and make practical choices for the crew’s daily routine. Use it to plan essentials from surface preparation and application to personal workwear, supporting a polished result without carrying unnecessary gear.
Key Takeaways
- Build your crew’s equipment budget around the job’s scope, preparation needs and protection requirements, rather than relying on a one-size-fits-all list.
- Separate interior and exterior essentials so the crew can protect nearby surfaces and choose practical gear for each work setting.
- For solvent-based paint or spraying, match respiratory protection and ventilation to the task and the product’s safety instructions.
- White Wear painters workwear and clothing can help complete a practical crew setup with apparel designed for painting work.
How much does it cost to outfit a painting crew in Australia?
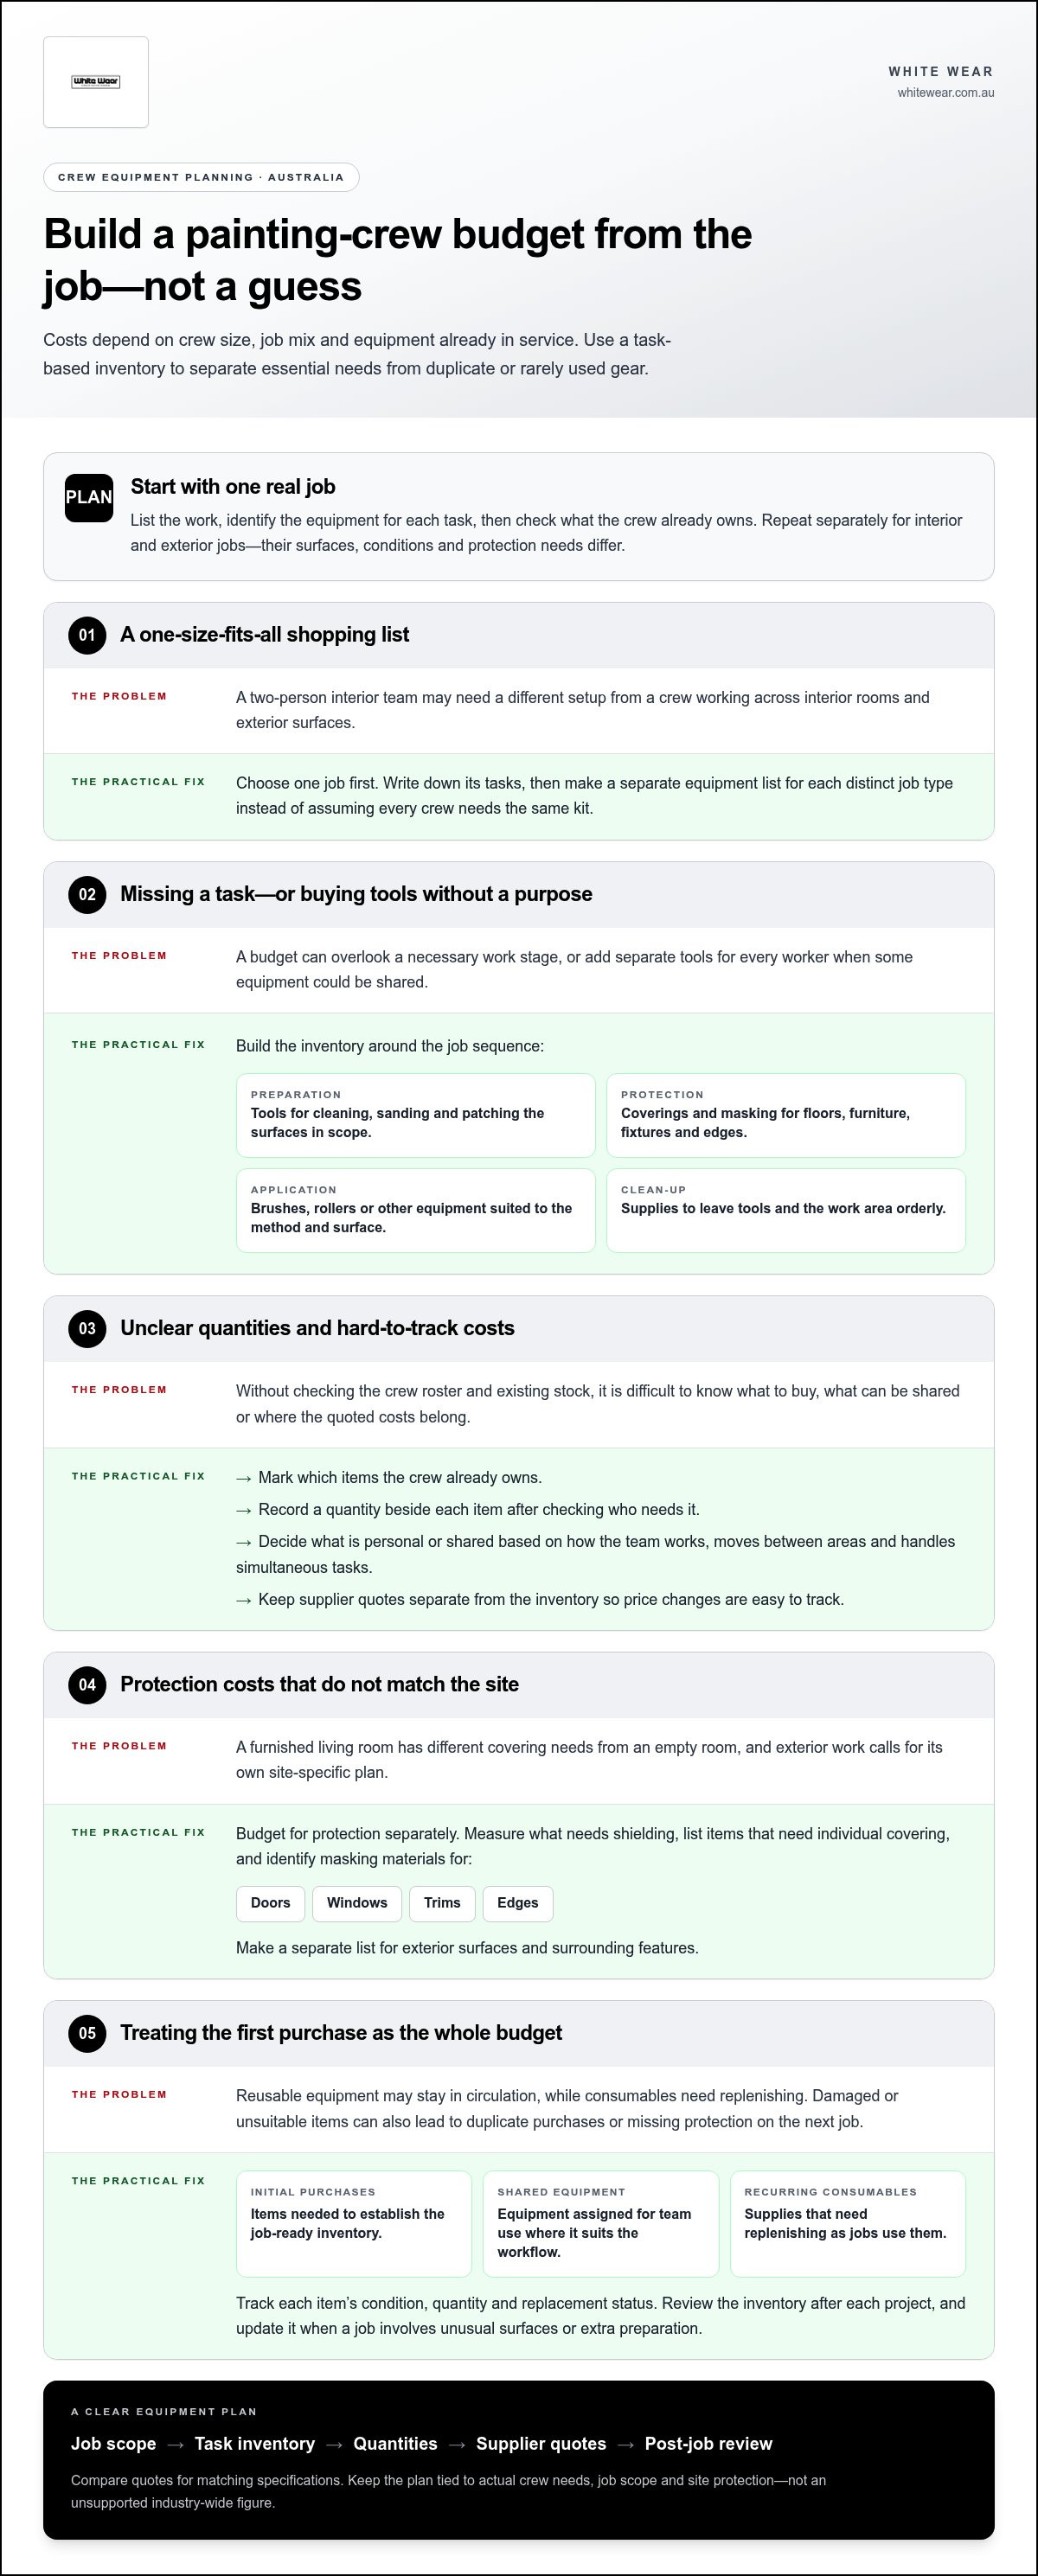
The cost depends on crew size, job mix and equipment already in service. A two-person interior team needs a different setup from a crew working across interior rooms and exterior surfaces. Build the budget from a task-based inventory, then count how many workers need each item. This gives you a project-specific total without treating every crew as identical.
Start with one job, not a broad shopping list. For a single interior repaint, list the tasks: surface preparation, covering floors and furniture, masking edges, applying paint and cleaning up. Add the equipment required for each task, then mark what the crew already owns. Repeat the exercise for an exterior job, where surfaces and work conditions differ. This separates essential purchases from duplicate or rarely used gear.
Build the budget around job stages
Use the work sequence to identify what the crew needs and where costs arise. Preparation equipment supports cleaning, sanding and patching; application equipment suits the chosen painting method. Protective coverings and masking materials help shield floors, furniture, fixtures and edges, while clean-up supplies complete the workflow. Missing a category can disrupt the job, but buying a separate tool for every worker may add avoidable expense.
- Preparation: list the tools needed for the surfaces and repairs in the job scope.
- Protection: estimate coverings and masking materials for the rooms, furniture and fixtures.
- Application: match brushes, rollers or other equipment to the chosen method and surface.
- Clean-up: include the items needed to leave tools and the work area orderly.
Next, record quantities for personal or shared use. A crew might assign hand tools to each painter while sharing larger equipment. The right split depends on how the team works, how often workers move between areas and whether tasks happen simultaneously. Note the quantity beside each item, then calculate costs using current supplier quotes. Keep quotes separate from the inventory so price changes are easy to track.
Budget for protection separately. A furnished living room needs a different covering plan from an empty room. Measure the surfaces to protect, identify items that need individual covering, and list masking materials for doors, windows, trims and edges. For exterior work, make a separate list based on the surfaces and surrounding features. This keeps the budget tied to the actual site.
Plan for ongoing replacement
The first purchase is only one part of the budget. Reusable equipment can stay in circulation, while consumables need replenishing as jobs use them. Create an inventory showing each item’s condition, quantity and replacement status. For example, separate clean, serviceable coverings from damaged ones before the next interior job. This helps the team avoid duplicate purchases or arriving without materials needed to protect a client’s space.
Review the inventory after each project. Record what was used, what remains suitable and what needs replacing. Compare interior and exterior jobs separately because their tasks and protection requirements differ. If a new job involves unusual surfaces or extra preparation, update the list before purchasing. Each estimate then becomes a clearer equipment plan, not a guess based on the last job.
For a practical budget, group the list into initial purchases, shared equipment and recurring consumables. Add quantities only after checking the crew roster and job scope. Compare supplier quotes for matching specifications, and note any delivery or replacement timing that affects the schedule. This creates a transparent cost plan for outfitting a painting crew in Australia, based on actual requirements rather than an unsupported industry-wide figure.
These figures describe whole projects, so they should not be treated as the cost of buying equipment.
Ask for a breakdown of the work and materials covered, then compare it with your task-based inventory before deciding whether equipment should be purchased, replaced or shared.
What respirators and ventilation are needed when painting with solvents or spraying?
Choose respiratory protection and ventilation for the specific coating and task, not just the job title. Solvent-based products and spray application can create different airborne exposures. Start with the product label and Safety Data Sheet (SDS), which identify the product and provide handling guidance. Follow them to determine the relevant protection and ventilation instructions before work begins.
For each coating, record its name, application method and SDS instructions in the job plan. Brushing a coating in a ventilated room is not the same task as spraying it in an enclosed area. Note whether the crew will spray, brush or roll, and where the work will take place. This task-specific record gives the person organising equipment a clear basis for selection.
Match the respirator to the product and task
No single respirator is suitable for every painting task. Select one only when the manufacturer’s guidance matches the coating and application method identified in the SDS. Check the respirator instructions for compatible filters or cartridges, fitting, use and replacement. If the product guidance and respirator instructions don’t clearly align, pause and resolve the selection before painting begins.
Follow the same sequence for each job when checking equipment:
- Identify: record the coating and read its label and SDS.
- Assess: note whether the crew will spray or apply by another method, and describe the work area.
- Select: match the respirator and any components to the product and task instructions.
- Prepare: inspect the equipment and follow the manufacturer’s fitting and use directions.
- Maintain: follow the stated cleaning, storage and replacement instructions.
Keep the selection record with the job documents. If the crew switches from rolling to spraying, review the task and equipment rather than assuming the original choice still applies. A different product also requires a fresh review of its label and SDS. This gives each worker clear instructions and helps prevent a respirator selected for one coating from being carried over automatically.
Plan ventilation around the work area
Plan ventilation around the room, product and application method. Check the coating instructions, then consider how air moves through the work area. An open window may not provide suitable airflow in every room or for every task. For spraying, consider where airborne material could travel and keep the work plan focused on the immediate area.
Before opening a container, identify doors, windows and available ventilation equipment. Plan how to maintain airflow without directing fumes or spray towards other people or occupied spaces. Conditions vary: a small enclosed room, a large interior space and an exterior wall each present different considerations. Don’t assume one open door provides adequate ventilation for every coating or application method.
During work, follow product instructions and monitor conditions in the work area. If the ventilation arrangement changes, reassess it before continuing. A closed window or a change in spray location, for example, can alter the original plan. Stop and review the setup if the crew can’t follow the stated product guidance. Record the change and action taken in the job notes.
Before starting, confirm that the product, application method, respirator instructions and ventilation plan align. Keep the SDS accessible to the crew and brief each painter on the equipment selected for the job. This step-by-step system makes respiratory protection part of the setup, not an afterthought.
Include surface protection and cost review in the broader job plan, but keep them separate from respiratory selection. The Paint Crew says it covers floors, furniture and other surfaces with protective sheets to guard against paint spills, dust and debris. This preparation can help keep the work area orderly, but it doesn’t replace product-specific ventilation or respirator directions.
Ask each painter to clarify the planned application method and site controls alongside any estimate, so the work plan can be assessed on its actual tasks. Melbourne Painting Crew is a second-generation family business with nearly 50 years of combined experience in Melbourne.
White Wear: Painters workwear
White Wear offers painters workwear and clothing for crews preparing for interior and exterior jobs. Once you’ve planned tools, surface protection and task-specific safety equipment, suitable workwear completes the crew setup. Painting involves repeated movement between preparation and application, so choose clothing designed for the demands of the trade. White Wear’s durable, functional painters clothing is designed to support comfort and performance on the job.
Consider painters clothing as part of your crew’s regular equipment planning, alongside the items each worker needs for the day’s tasks. It’s a straightforward next step when reviewing what the team wears on site. For painters workwear and clothing, visit whitewear.com.au.
Make your next crew setup more intentional
Build a reliable setup job by job, then refine it as the crew’s routine evolves. Before the next project, turn equipment decisions into a working checklist: note what each task requires, who needs each item and what to review before work begins. This gives the team a consistent starting point without locking you into one kit for every site.
Use the checklist to make outfitting a painting crew in Australia a deliberate part of planning, not a last-minute scramble. Keep it practical, update it when the work changes, and make sure each painter knows what they’re responsible for bringing and maintaining. That gives the crew a considered start on site, ready to focus on the finish.
For a considered addition to your team’s workwear, contact White Wear about crew gear. Take the next step with confidence and build a setup that works for your crew.
Frequently Asked Questions
What PPE and safety equipment do Australian painting crews need?
Australian painting crews should select PPE for the hazards of each task, rather than rely on one fixed kit. Spraying may call for eye and skin protection alongside respiratory protection, while sanding presents a different exposure to assess. Review the coating label and Safety Data Sheet, work method, access conditions and nearby people before choosing equipment. Include the task-specific decisions in the crew briefing.


